- Who can: a user with the “Manage Studio” permission
- Where: Studio › Workflows › the workflow › the “Trigger” node
- Time: ≈ 5 minutes per trigger
Before you start
You need a workflow with a “Trigger” node — see Create a workflow. Click the node: its settings open on the right. The “Trigger type” field decides what starts the workflow:
- “Event” — something happened in your account, for example a new shipment request.
- “Manual” — a person starts it: from the editor or with a button in the carrier network.
- “Webhook” — another system sends a request to the workflow’s address.
- “Schedule” — at set times, for example every weekday morning.
Whatever starts the workflow, its data is available to later nodes under trigger. How to use it: Use data from earlier steps.
Steps
Pick the tab for the trigger type you need.
In the example, “Demo: Reefer requests only” gives a dispatcher a task only for new requests with a reefer body.
Pick the event
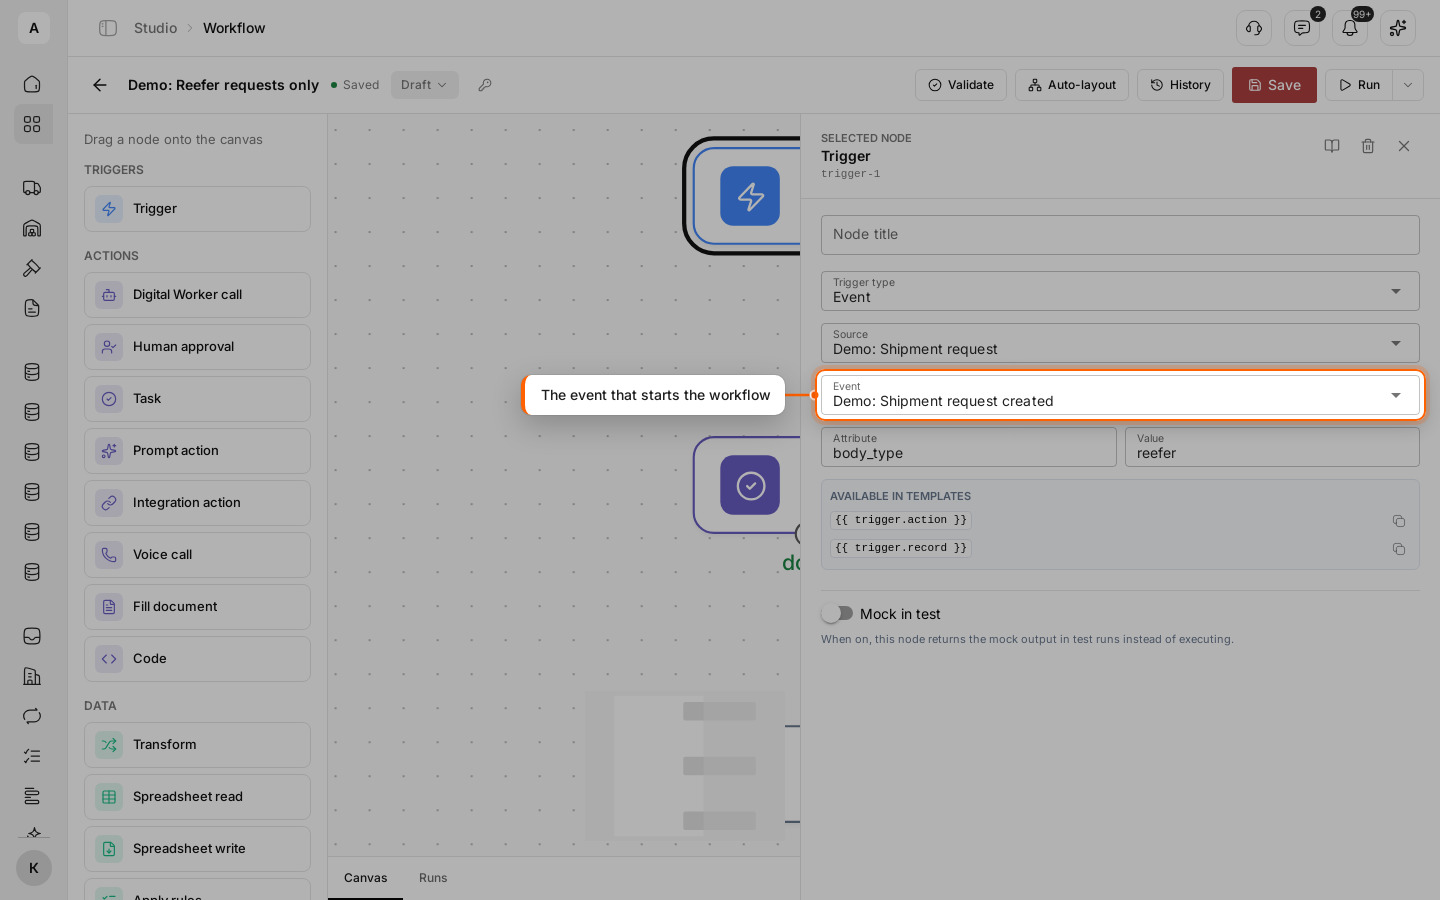
In “Trigger type”, select “Event”. In “Source”, select the data model “Demo: Shipment request”, and in “Event”, “Demo: Shipment request created”.
A data model has three events: “… created”, “… updated” and “… deleted”. Under “Products” in “Source”, the built-in products offer their own events, such as “Bid received” — see System products.
Start only for some records
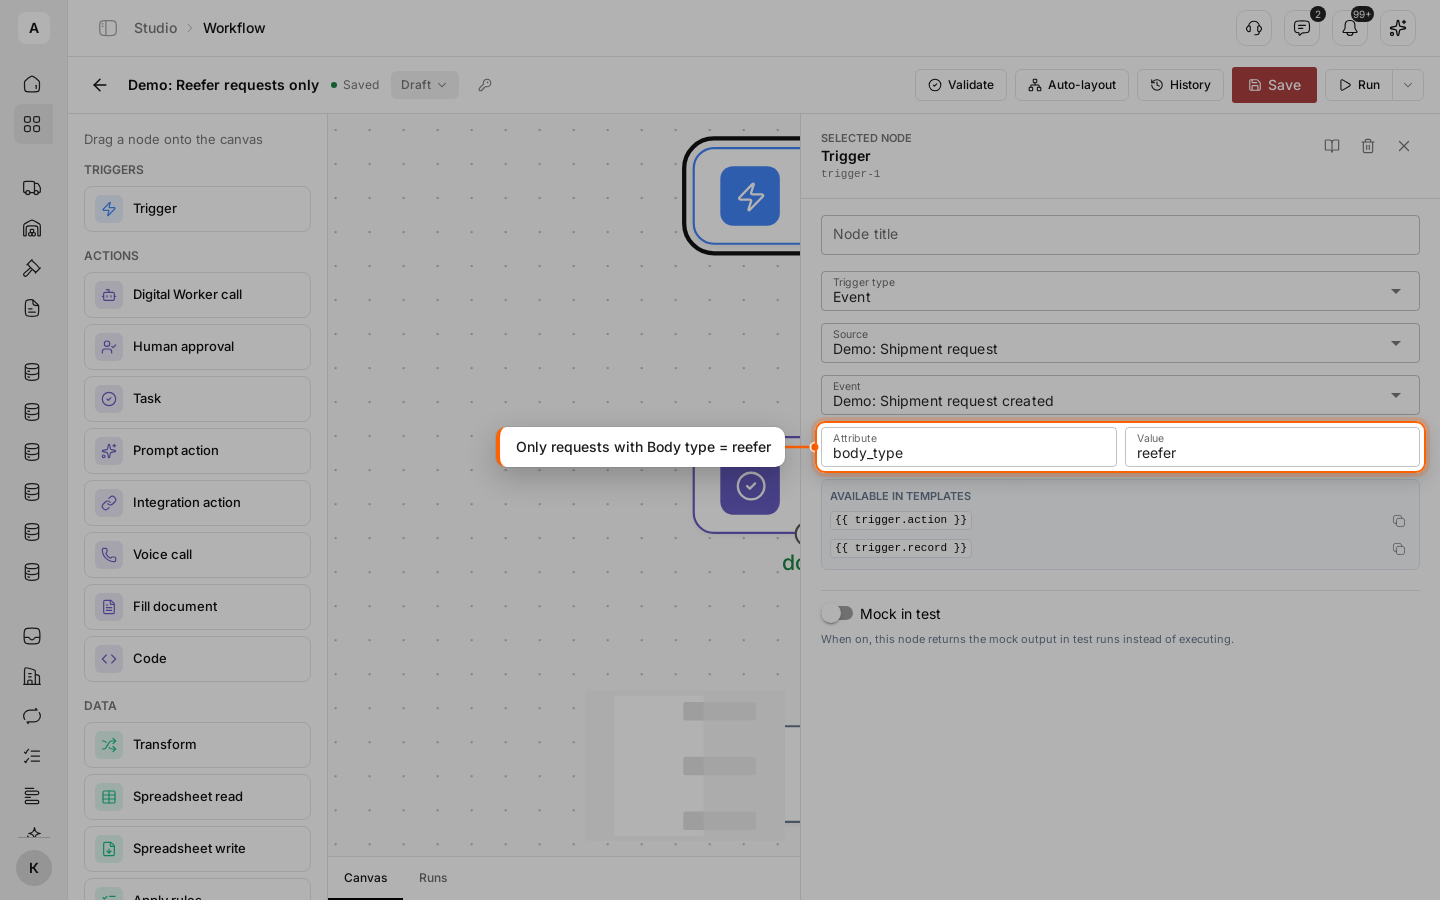
To react to some records only, fill in “Attribute” and “Value”. “Attribute” is the field key from the data model, “Value” is the value the field must hold. For reefer requests: attribute body_type, value reefer.
The value must match exactly. For a choice field, enter the option’s stored value (reefer), not its label (“Reefer”). The request “Odesa → Dnipro” starts the workflow, “Kyiv → Lviv” with a curtainsider body does not.
Use the record in later nodes
The fields of the record are under trigger.record.data, the record ID is trigger.record.id. In the example the task title is Book a reefer for {{ trigger.record.data.route }}.
Save the workflow. It starts reacting to new records once you publish it.
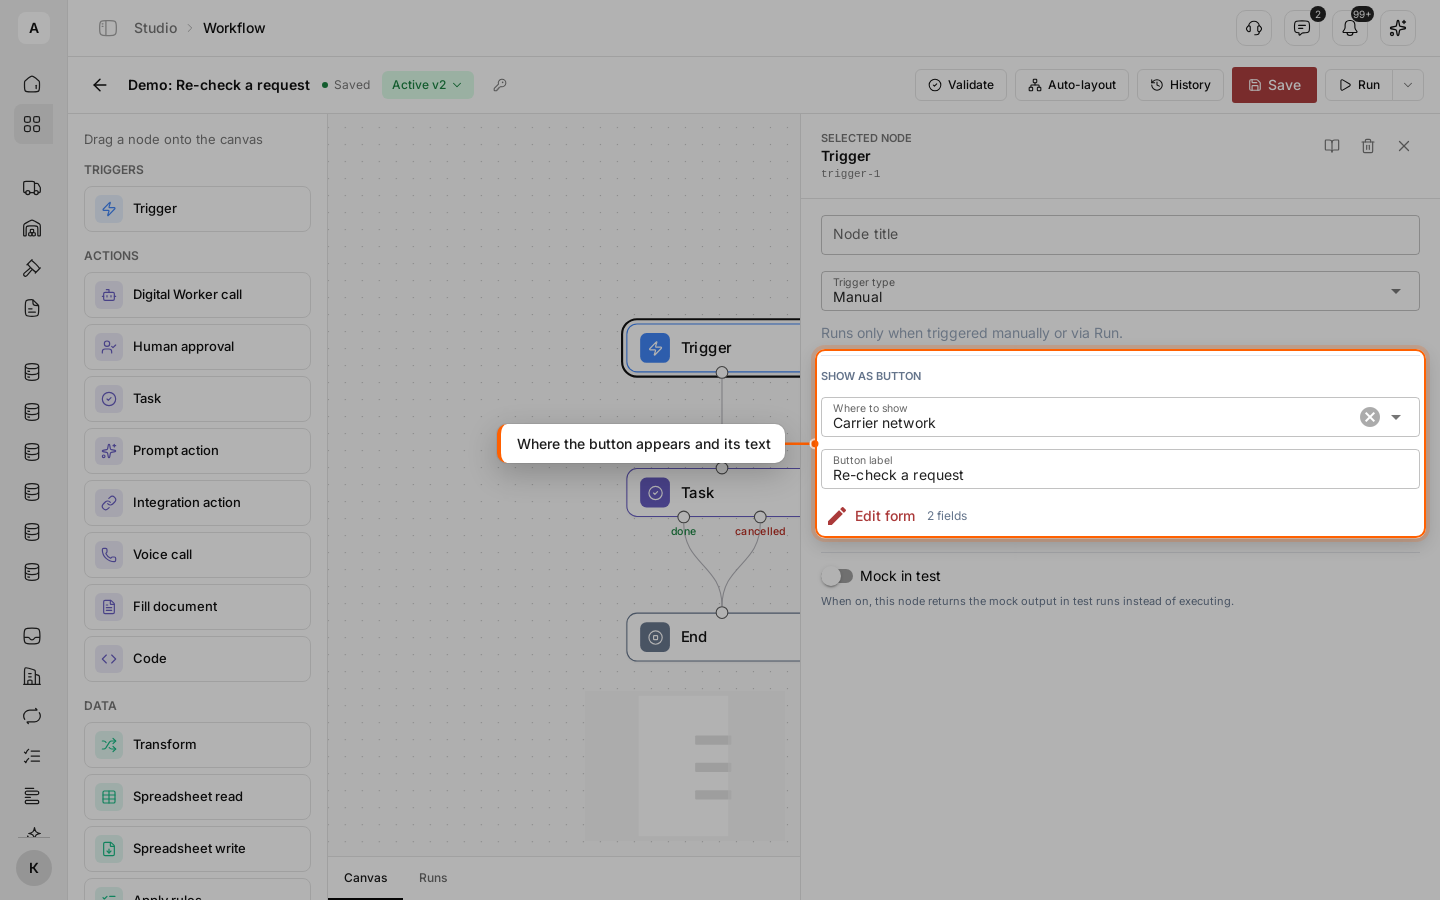
In the example, “Demo: Re-check a request” adds a button to the carrier network. A dispatcher picks a carrier, enters the route, and the workflow creates a task to re-check the request with that carrier.
Select “Manual”
In “Trigger type”, select “Manual”. Without a button, such a workflow runs only from the editor. A workflow can have one manual trigger.
Show it as a button
Under “Show as button”, select “Carrier network” in “Where to show”. Enter the “Button label” — the text people see, for example “Re-check a request”.

Ask for data before the run
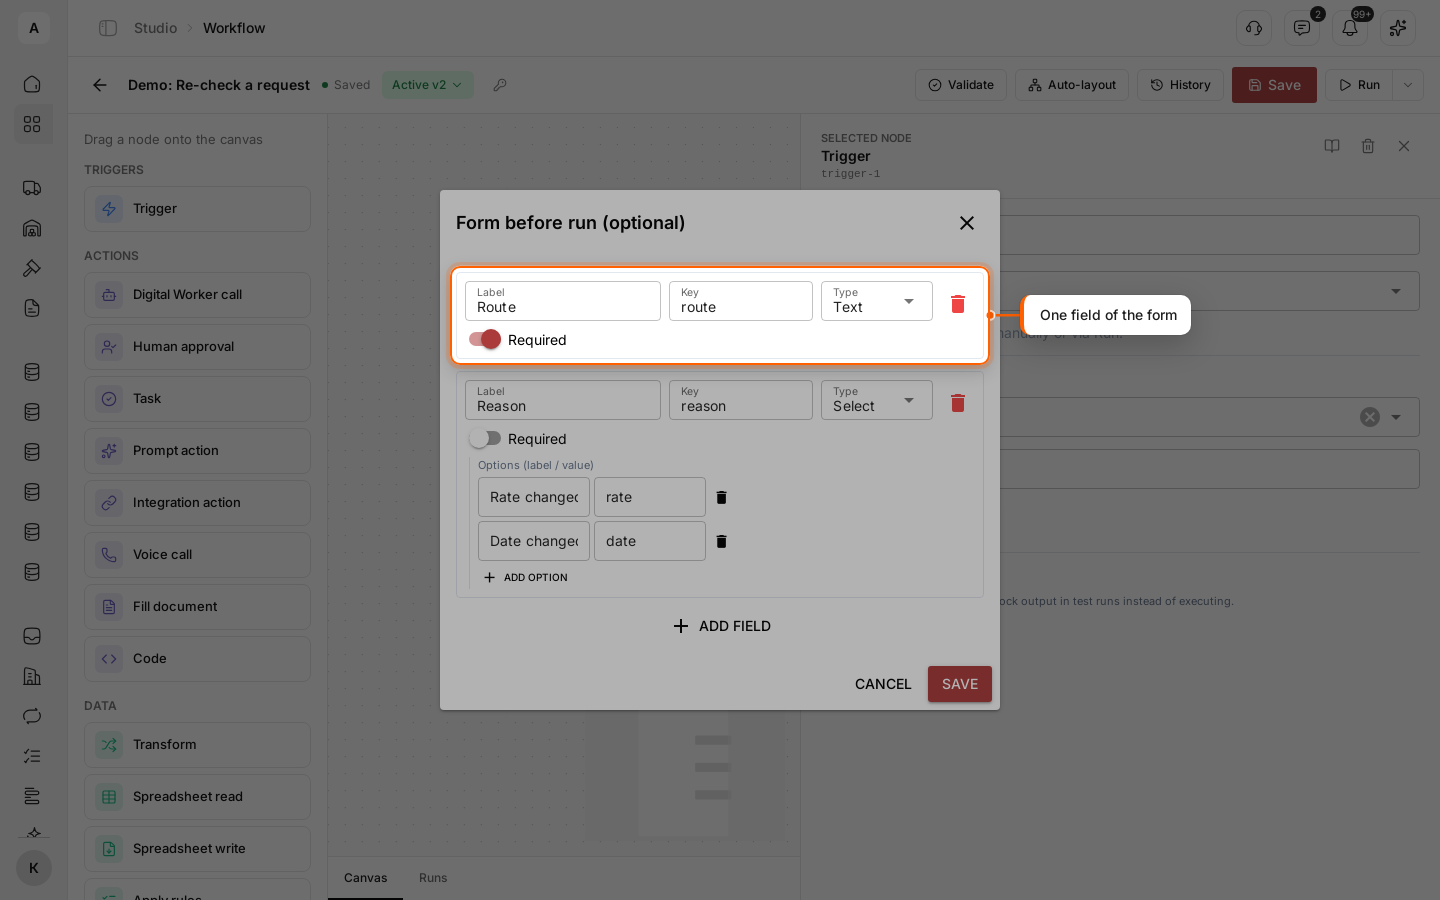
Click Add form (Edit form once the form has fields). For each field, enter the “Label” people see, the “Key” you use in the workflow and the “Type”: “Text”, “Number” or “Select”. Turn on “Required” where an answer is a must. A select field needs options, each with a label and a value.
The key takes lowercase Latin letters, digits and _, and starts with a letter. In the example: “Route” with the key route, and “Reason” with the options “Rate changed” (rate) and “Date changed” (date). Click Save.

Publish and find the button
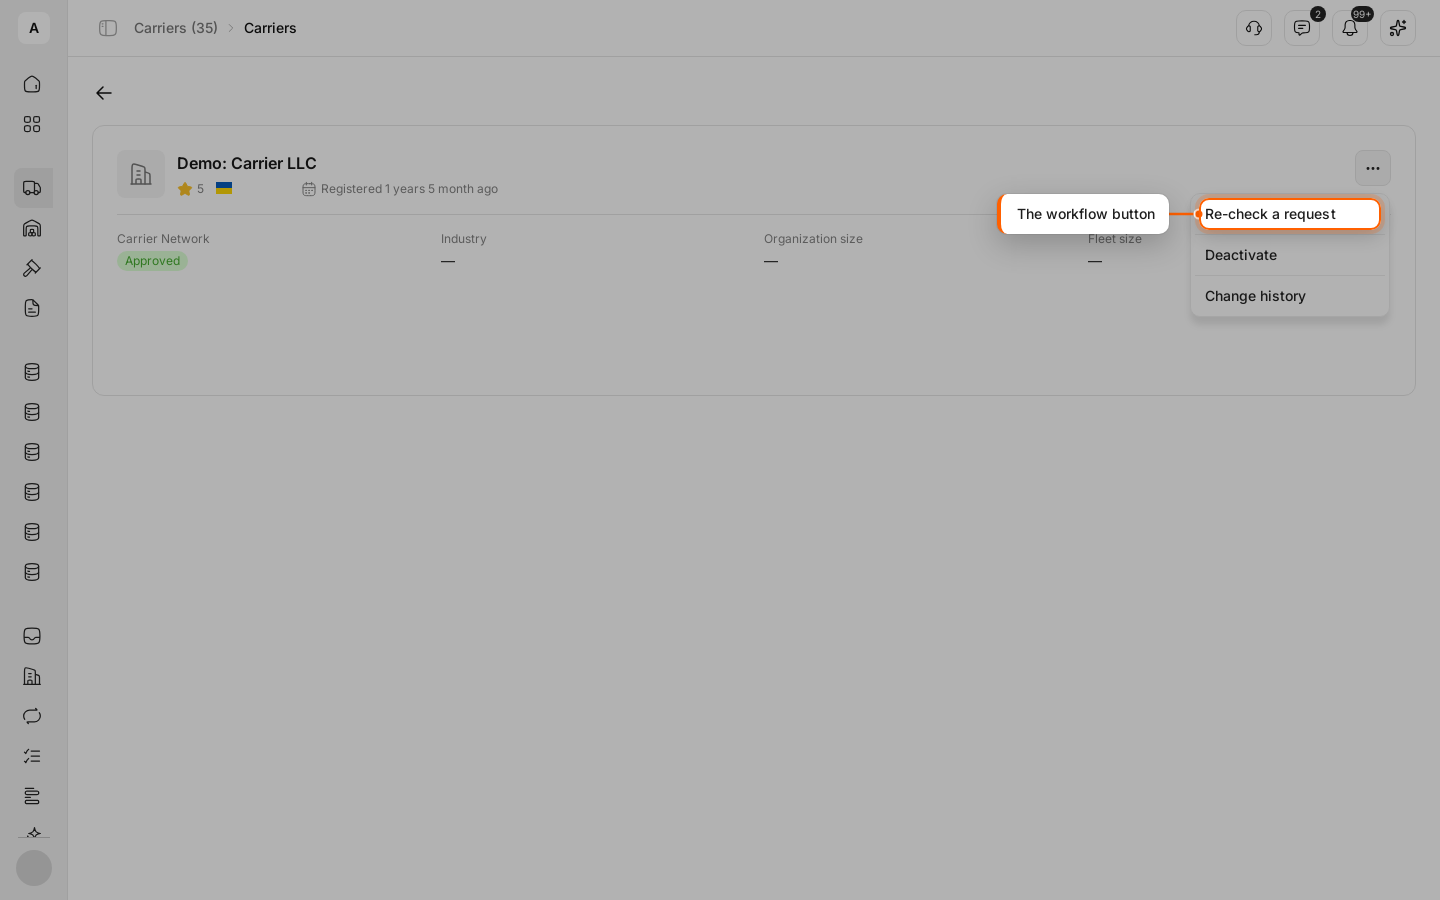
Publish the workflow: the button appears only for a published version. Open Carriers › Network and open a carrier. The button is in the ⋯ menu next to the carrier’s name. In the network list, select several carriers and use the ⋯ menu in the bar at the bottom: the workflow then runs once for every selected carrier.

Fill in the form
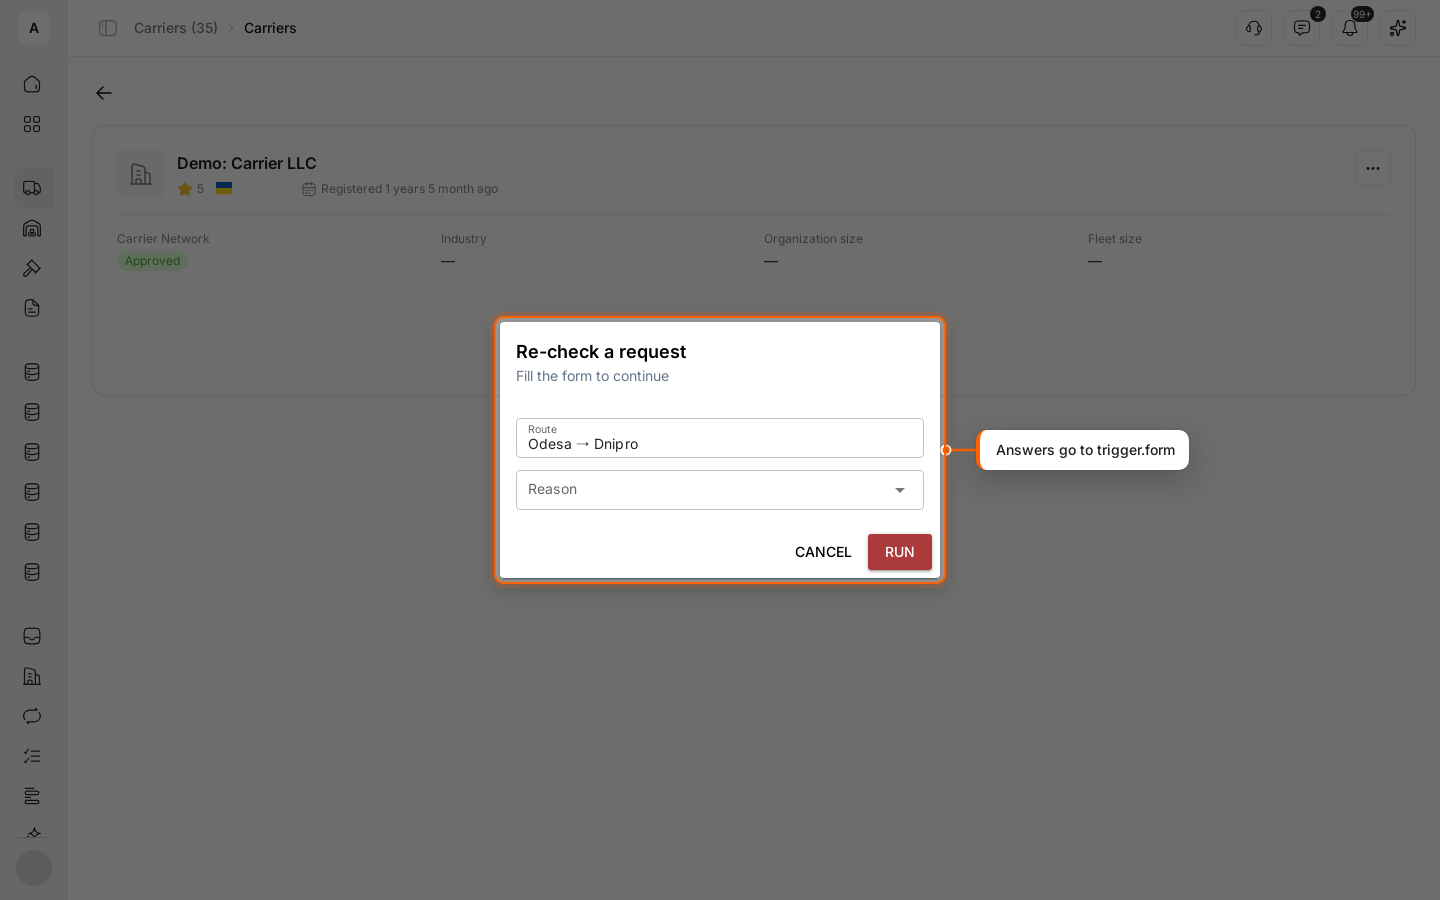
Clicking the button opens the form. Fill it in and click Run. The answers come to the workflow under trigger.form: the route from the example is trigger.form.route, the reason is trigger.form.reason. The carrier the button was pressed on is under trigger.catalog.

Run it from the editor
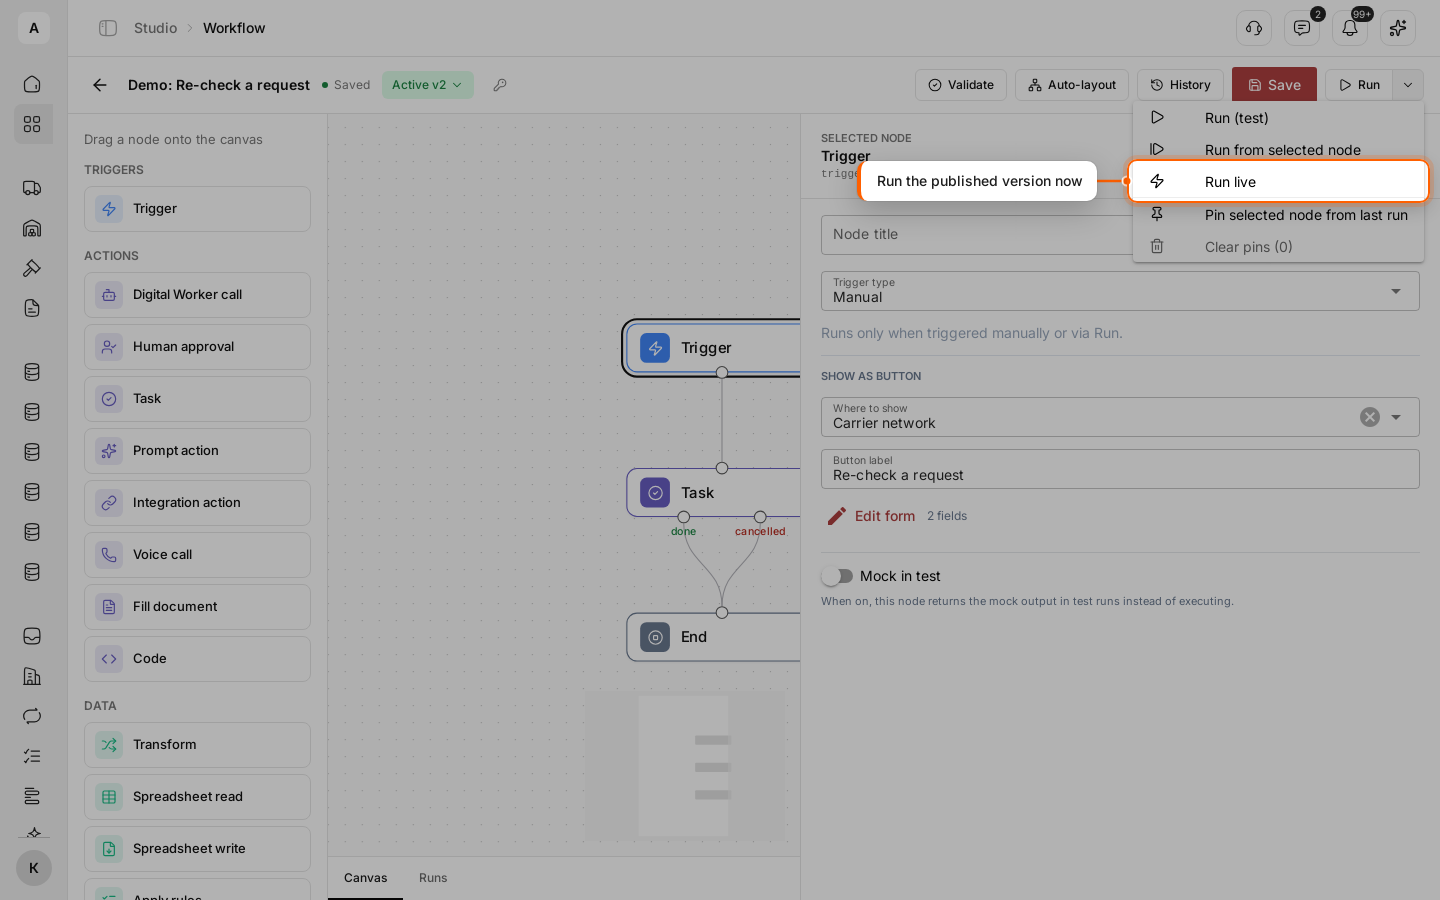
You can also start a manual workflow in the editor. Click the arrow next to Run: Run (test) runs the draft, Run live runs the published version for real. Both open a window where you enter the trigger data as JSON, for example {"form": {"route": "Odesa → Dnipro"}}.

In the example, “Demo: Request from a partner system” receives shipment requests from another system: a customer’s ERP, a partner’s TMS or a form on your website.
Select “Webhook”
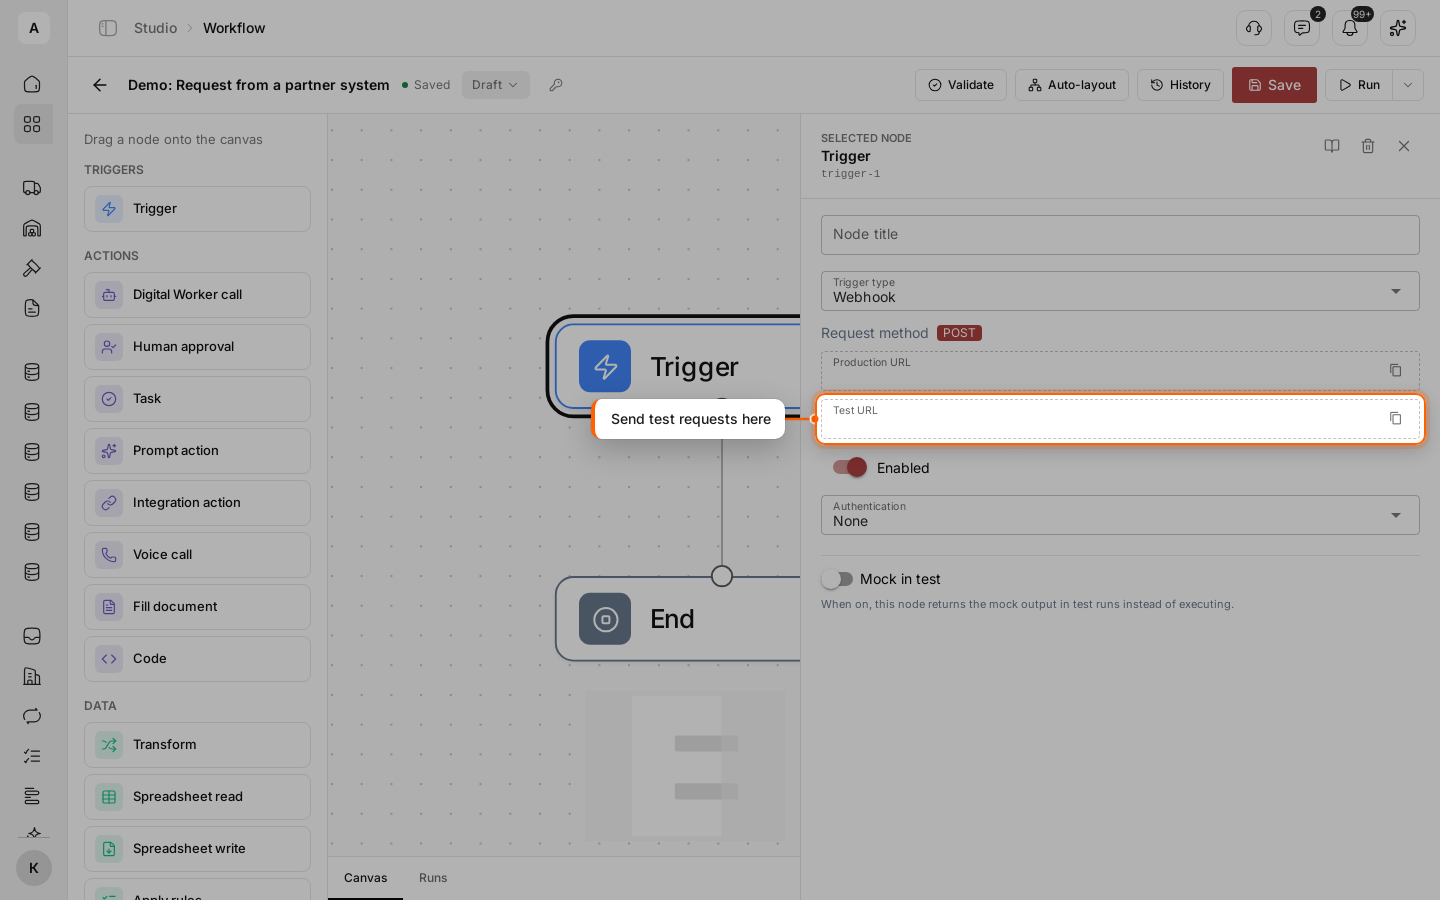
In “Trigger type”, select “Webhook”. The workflow gets two addresses. Copy them with the button at the end of the field.
- “Production URL” starts the published version. Give it to the other system once you publish the workflow.
- “Test URL” starts the current draft as a test run. Use it while you build the workflow.
The “Request method” is always POST. To stop accepting requests, turn off “Enabled”.

Choose the protection
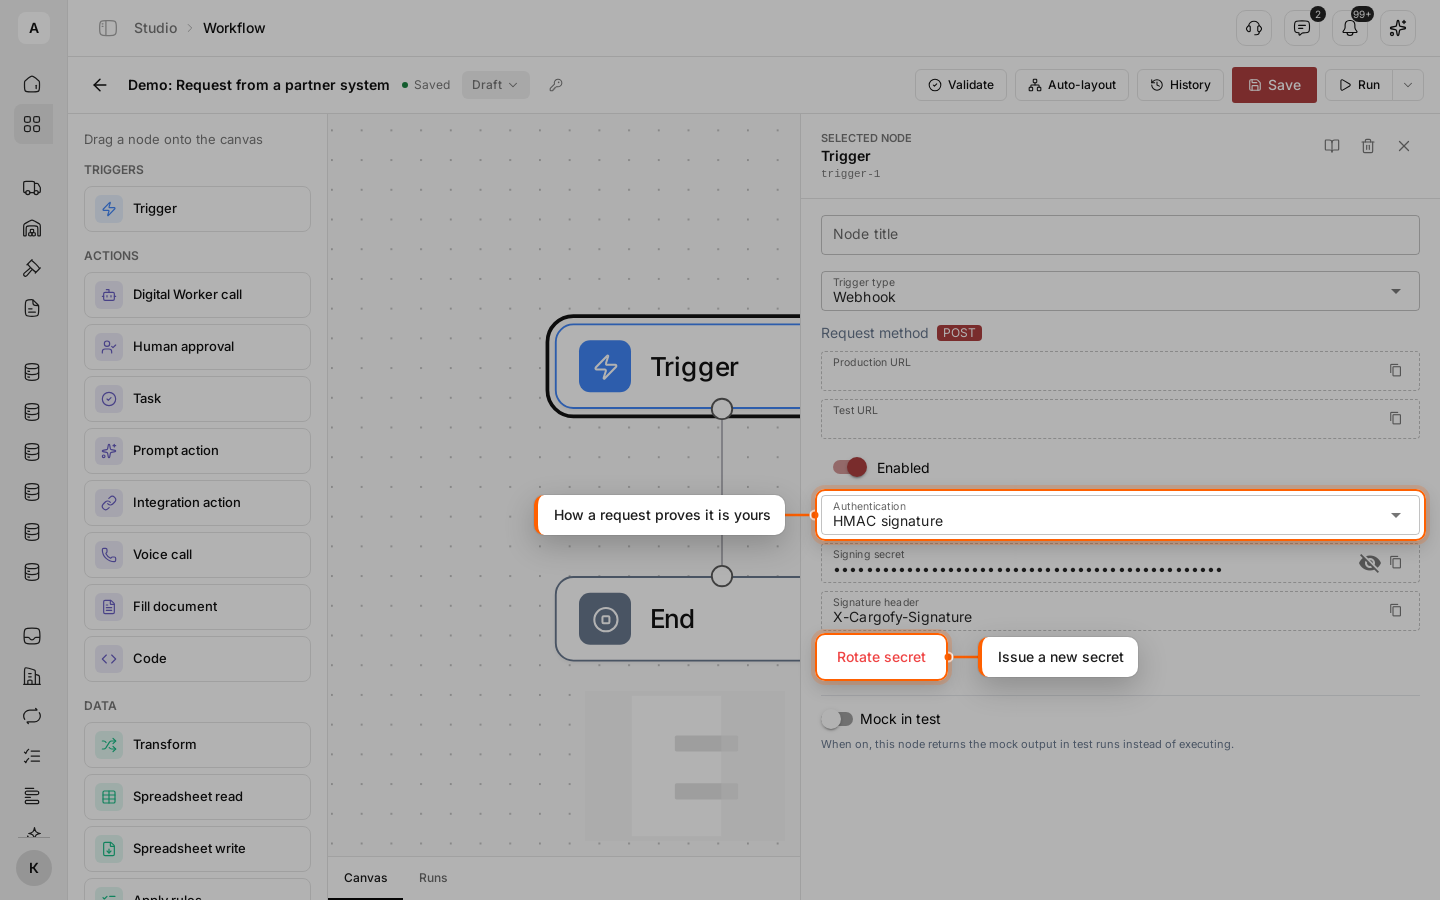
In “Authentication”, select how a request proves it comes from your partner:
- “None” — anyone with the link can start the workflow. Keep the link secret.
- “HMAC signature” — the sender signs the request body with the “Signing secret” and sends the signature in the
X-Cargofy-Signatureheader assha256=<signature>. The secret itself never travels. - “Header token” — the sender puts the secret into the header named in “Header name”. Use this mode when the system sends files.
Rotate secret issues a new secret. The old one stops working at once: update the other system right away.

Send a test request
Send a request to the “Test URL”. A partner system sends something like this (copy your real address from the field):
curl -X POST "https://api.example.com/hooks/1a2b3c4d/test" \
-H "Content-Type: application/json" \
-d '{"route": "Odesa → Dnipro", "loading_date": "2026-11-13", "weight_kg": 12000, "body_type": "reefer"}'The answer holds the run ID and "is_test": true. With “HMAC signature”, add the header with the signature of the exact body you send.
See what arrived
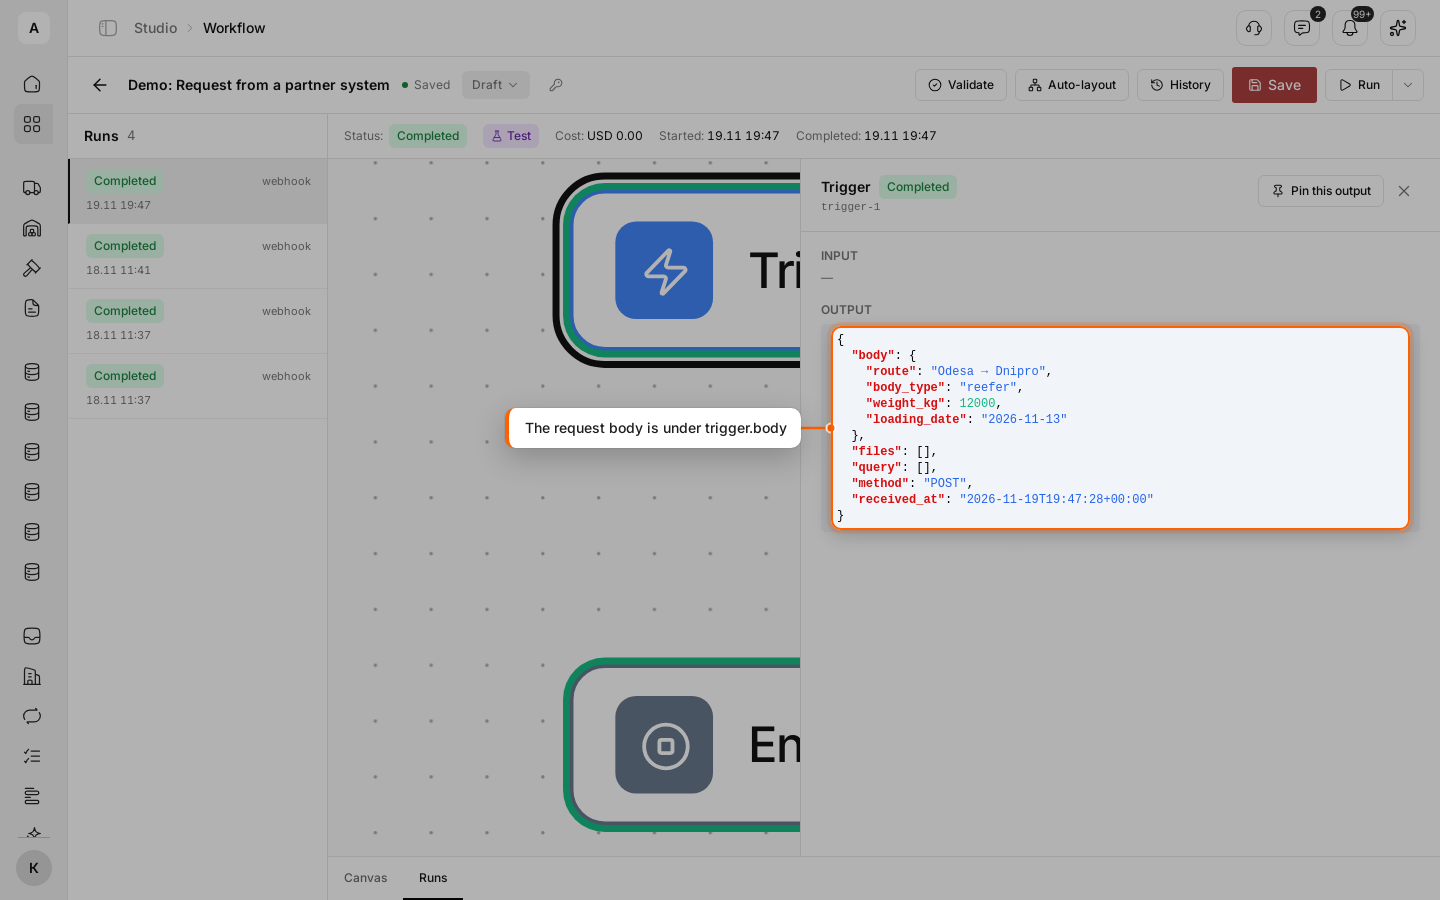
Open the Runs tab under the canvas and click the “Trigger” node of the new run. The request is under trigger:
trigger.body— the body the system sent:trigger.body.routeis “Odesa → Dnipro”,trigger.body.weight_kgis 12000.trigger.query— the parameters from the address,trigger.headers— the request headers.trigger.files— the uploaded files,trigger.received_at— when the request arrived.

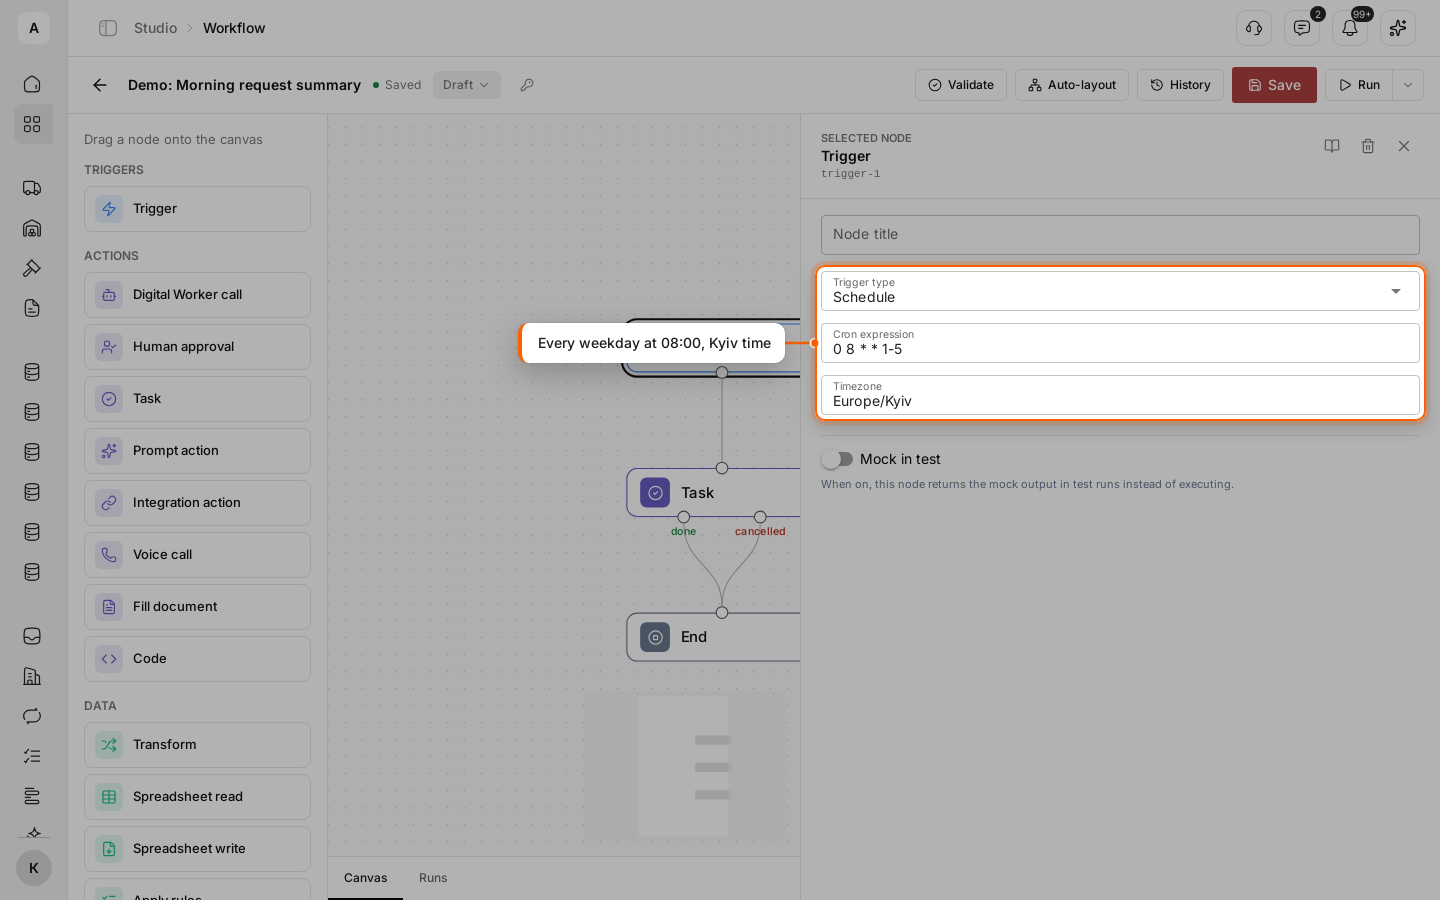
In the example, “Demo: Morning request summary” gives a dispatcher a task to review new requests every weekday at 08:00, Kyiv time.
Set the time
In “Trigger type”, select “Schedule”. In “Cron expression”, enter when to start, as five fields: minute, hour, day of month, month, day of week. In “Timezone”, enter the time zone by name, for example Europe/Kyiv. Without it, the time is UTC.
Every weekday at 08:00: 0 8 * * 1-5. Every 30 minutes: */30 * * * *. On the 1st of every month at 09:00: 0 9 1 * *.

Publish
Only a published workflow runs on schedule. Each run gets the start time as trigger.scheduled_at, in UTC. To check the steps before that, use Run (test).
Important
Every trigger except a test run works with the published version. A saved draft does not react to events, buttons, the production address or the schedule.